 Pin it
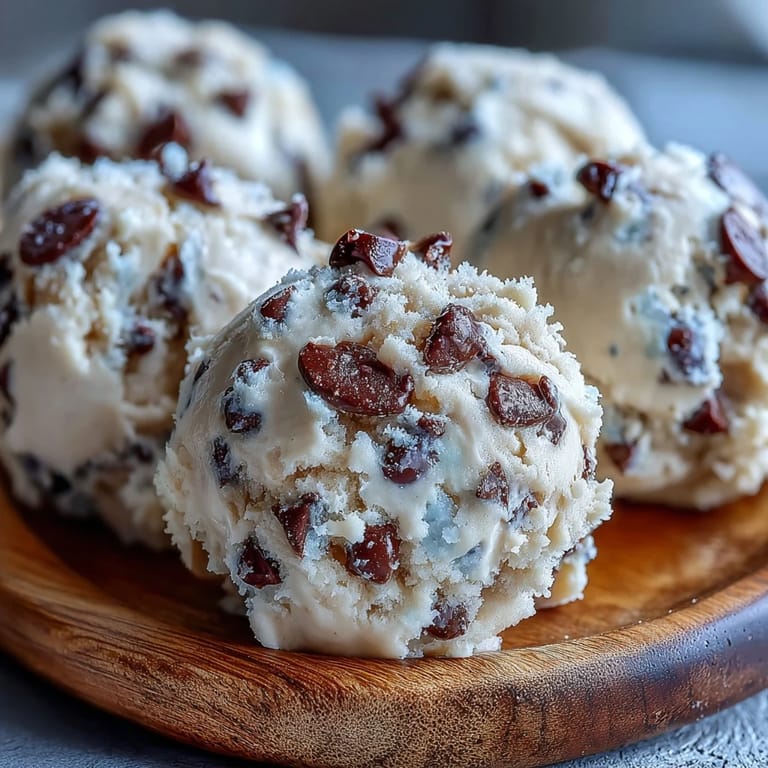
 My sister once stood at the counter with a mixing bowl between us, scooping raw batter straight from the spoon like she'd discovered something scandalous. That was years before edible cookie dough became a thing, when kitchens still whispered warnings about raw eggs and flour. This Greek yogurt version skips all that worry and delivers the same buttery, sweet, chip-studded bliss she used to steal. The tang from the yogurt balances the richness, and the texture is somehow creamier than any batter I've ever snuck. It's the grown-up permission slip we never knew we needed.
I made a double batch for a friend's birthday once, portioned into little jars with ribbons tied around the lids. She texted me at midnight saying she'd eaten three servings in one sitting and felt zero regret. There's something about handing someone dessert they don't have to bake that feels like a tiny act of rebellion. We laughed about how our mothers would have scolded us for even thinking about eating raw dough. Now we just call it a recipe and everyone wins.
Ingredients
- Unsalted butter, softened: The foundation of that classic cookie richness, it creams beautifully with sugar and carries flavor through every bite without adding extra salt.
- Plain full-fat Greek yogurt: This is the secret ingredient that adds moisture and tang, cutting through the sweetness while lending a creamy texture you won't get from milk or cream.
- Granulated sugar: Provides clean sweetness and helps the butter whip into a light, fluffy base that holds everything together.
- Light brown sugar, packed: Brings a hint of molasses and deeper caramel notes that make this taste like real cookie dough, not just frosting.
- Pure vanilla extract: A small splash that rounds out all the other flavors and adds warmth you can smell before you even taste it.
- All-purpose flour, heat-treated: Toasting it in the oven kills any bacteria, making raw dough safe to eat and giving it a faintly nutty aroma in the process.
- Fine sea salt: Just enough to balance the sugars and make the chocolate chips pop without tasting salty.
- Mini semisweet chocolate chips: They distribute more evenly than regular chips and give you chocolate in nearly every spoonful, which is exactly the point.
Tired of Takeout? 🥡
Get 10 meals you can make faster than delivery arrives. Seriously.
One email. No spam. Unsubscribe anytime.
Instructions
- Heat-Treat the Flour:
- Preheat your oven to 350°F and spread the flour thin on a baking sheet, then bake for 5 minutes until it smells toasty. Let it cool completely so it doesn't melt the butter later.
- Cream the Butter and Sugars:
- Beat the softened butter with both sugars on medium speed for 2 to 3 minutes until the mixture looks pale and fluffy, almost like buttercream. This step builds the dough's structure and sweetness.
- Add Yogurt and Vanilla:
- Turn the mixer to low and blend in the Greek yogurt and vanilla until the mixture is smooth and cohesive. You'll notice it might look slightly curdled at first, but it will come together.
- Combine Dry Ingredients:
- Whisk the cooled flour and sea salt in a separate bowl, then add it slowly to the wet mixture on low speed. Stop as soon as no white streaks remain to avoid a tough, dense dough.
- Fold in Chocolate Chips:
- Use a spatula to gently stir in the mini chocolate chips until they're scattered throughout. This keeps the dough light and prevents overmixing.
- Chill to Firm:
- Cover the bowl with plastic wrap or move the dough to an airtight container, then refrigerate for at least 30 minutes. This step makes it scoopable and enhances the flavors as they meld together.
- Serve and Store:
- Scoop out tablespoon-sized portions and enjoy straight from the fridge, or freeze individual servings for up to a month. Thaw in the fridge before indulging for the best creamy texture.
 Pin it
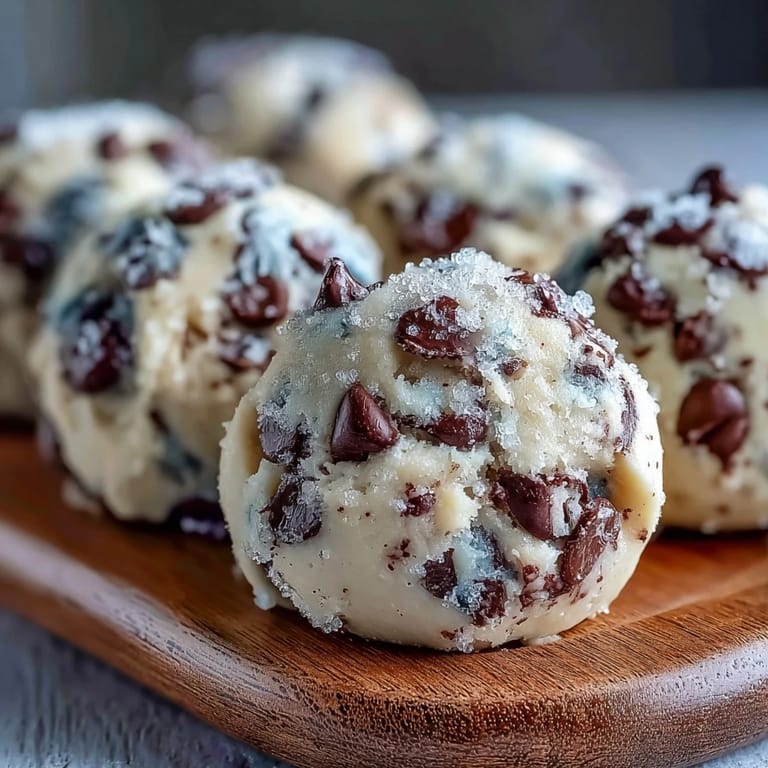
 One rainy afternoon, I portioned this dough into ice cube trays and froze them, thinking I'd invented the perfect single-serving system. My husband found them a week later and assumed they were some kind of experimental butter cubes, which led to a very confusing conversation before I explained. Now we keep a stash in the freezer labeled clearly, and it's become our go-to comfort snack when the weather turns gray. There's something quietly joyful about pulling out a frozen cube and watching it soften just enough to dig a spoon into.
How to Heat-Treat Flour Safely
The oven method is foolproof, just spread the flour thin and bake it at 350°F for 5 minutes, stirring halfway if you're nervous about hot spots. If you don't want to turn on the oven, microwave one cup at a time on high for about a minute, stirring every 20 seconds and checking with a thermometer until it hits 165°F. Either way, let it cool completely before adding it to your dough or you'll end up with melted butter and a grainy mess. I used to skip this step and tell myself it was fine, until I read one too many articles about foodborne illness and decided peace of mind was worth five extra minutes.
Customizing Your Cookie Dough
Swapping half the flour for finely ground oat flour makes the dough lighter and adds a subtle nutty sweetness that pairs beautifully with chocolate. You can also fold in chopped walnuts, sprinkles, or dried cranberries depending on your mood or what's already in the pantry. For a dairy-free version, non-dairy yogurt and vegan butter work surprisingly well, though the texture will be slightly softer and less rich. I've made this with almond butter instead of regular butter once when I ran out, and while it tasted amazing, it was more like a protein dough than classic cookie dough.
Storing and Serving Tips
This dough keeps in the fridge for up to five days in an airtight container, and the flavors actually deepen as it sits. For longer storage, roll tablespoon-sized portions into balls, freeze them on a tray, then transfer to a freezer bag where they'll keep for a month without losing texture. When you're ready to eat, let them thaw in the fridge for about 30 minutes, they should be firm but scoopable, not rock-hard. Serve it straight from the spoon, spread it on graham crackers, or use it as a dip for apple slices if you're feeling virtuous.
- Always label your freezer bags with the date so you don't end up guessing how long they've been in there.
- Let frozen portions thaw in the fridge, not on the counter, to keep the texture creamy and safe.
- If the dough feels too stiff after chilling, let it sit at room temperature for 5 minutes before scooping.
 Pin it
 This dough has become the thing I make when I need a win in the kitchen without the pressure of perfection. It's forgiving, fast, and tastes like the kind of treat you'd hide from everyone else, even though it's better when shared.
Common Questions
- → Is this safe to eat raw?
Yes, this dough is designed to be eaten raw safely. The flour is heat-treated to eliminate any bacteria, and there are no raw eggs in the mixture. Just follow the instructions for heating the flour before mixing.
- → How long does it keep in the refrigerator?
You can store this chilled for up to five days in an airtight container. The texture actually improves after chilling, as the flavors meld together and the dough firms up perfectly for scooping.
- → Can I freeze this dough?
Absolutely. Portion the dough into tablespoon-sized balls and freeze in a sealed bag for up to one month. Thaw in the refrigerator before eating for the best texture.
- → Why use Greek yogurt instead of eggs?
Greek yogurt adds creaminess and a subtle tang that balances the buttery sweetness, while providing structure without eggs. It also keeps the dough perfectly scoopable straight from the refrigerator.
- → What's the purpose of heat-treating the flour?
Heat-treating flour to 165°F kills any potential bacteria, making the dough safe to consume raw. This quick step in the oven ensures you can enjoy this treat without any food safety concerns.
- → Can I make this dairy-free?
Yes, substitute the butter with vegan butter and use a dairy-free yogurt alternative. The texture and taste will remain delicious while accommodating your dietary needs.