 Pin it
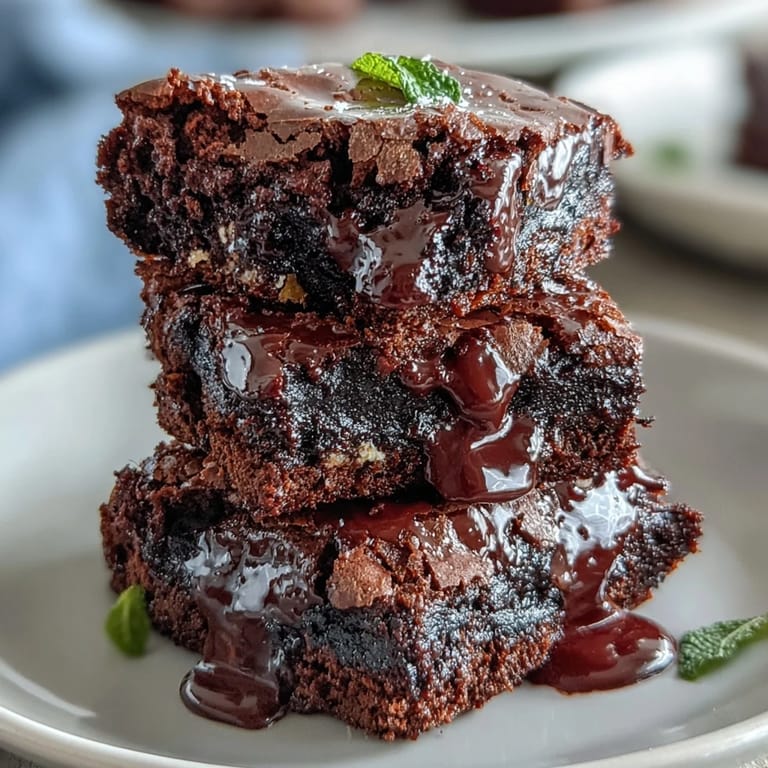
 My coworker brought these to the office on March 17th, and I watched three people actually pause mid-conversation to close their eyes after the first bite. That's when I knew I had to figure out what she'd done—turns out, it was this ridiculously simple combination of fudgy brownie bites with a whisper of mint and a festive green tint that somehow made chocolate taste like a holiday. Since then, I've made them at least a dozen times, each batch disappearing faster than the last.
I remember standing in my kitchen on a random Tuesday evening, mint extract open on the counter, and my mom called asking what smelled amazing. When I explained what I was baking, she drove over twenty minutes later without being invited—just showed up because the aroma through the phone was enough to pull her in. We sat at the kitchen table eating warm brownie bites straight off the cooling rack, and she told me they reminded her of the mint condition of her garden in summer.
Ingredients
- All-purpose flour (3/4 cup): This is your foundation, giving the bites structure so they hold together without becoming cakey—don't sift unless your flour has been sitting for months.
- Unsweetened cocoa powder (1/2 cup): This is non-negotiable; use the real stuff, not hot chocolate mix, because those bites deserve the deep chocolate flavor that makes mint actually shine.
- Baking powder (1/2 tsp) and salt (1/4 tsp): These lift the batter slightly and balance the sweetness so the mint doesn't taste like you're eating toothpaste.
- Unsalted butter (1/2 cup), melted and cooled: Letting it cool slightly prevents the eggs from scrambling when you add them, keeping the crumb tender and fudgy.
- Granulated sugar (1 cup): This sweetness is what carries the mint flavor without letting it dominate—use regular white sugar, not brown, to keep the mint bright.
- Large eggs (2) at room temperature: Cold eggs resist blending, so pull them out of the fridge about 20 minutes before starting; they'll bind everything smoothly.
- Pure vanilla extract (1/2 tsp): This adds warmth that makes the chocolate deeper, creating a bridge between the fudgy brownie and the cool mint.
- Peppermint extract (1/2 tsp): This is where the magic lives, but restraint matters—too much and you're eating a candy cane, not a brownie.
- Green food coloring (2-3 drops, optional): I skip this most of the time, but it does catch people's eyes and screams St. Patrick's Day.
- Mini chocolate chips (1/2 cup): The smaller size means more pockets of chocolate throughout, plus they melt slightly in the warmth of the batter, adding texture.
- Chopped Andes mints or mint chocolate pieces (1/4 cup, optional): These add pockets of concentrated mint flavor and extra chocolate contrast, making some bites more minty than others in the best way.
Tired of Takeout? 🥡
Get 10 meals you can make faster than delivery arrives. Seriously.
One email. No spam. Unsubscribe anytime.
Instructions
- Get your oven ready and prep the tin:
- Preheat to 350°F and grease your mini muffin tin or line it with papers—this step takes two minutes but saves you from brownie-shaped frustration later. I always use papers because it makes removal foolproof and cleanup instant.
- Combine your dry ingredients:
- Whisk flour, cocoa powder, baking powder, and salt together in a medium bowl, breaking up any cocoa lumps as you go. This distribution ensures every bite has consistent chocolate flavor and rise.
- Mix the wet base:
- In a large bowl, whisk melted butter and sugar together until they're well combined and slightly fluffy—about 30 seconds. Add eggs one at a time, whisking between each addition, then add vanilla and peppermint extracts and mix until the mixture is smooth and glossy.
- Add your color (optional):
- If using green food coloring, drop it in now and whisk until the batter is evenly tinted—just 2-3 drops creates a subtle festive green that doesn't look artificial.
- Fold in the dry mixture:
- Pour the dry ingredients into the wet mixture and fold gently with a spatula, stirring until just combined—overmixing develops gluten and makes the bites tough, so stop as soon as you don't see dry flour. The batter should look fudgy and thick.
- Add chocolate and mint pieces:
- Stir in mini chocolate chips and chopped Andes mints if using, folding them in carefully so they're distributed throughout. Reserve a small handful of chips for topping.
- Fill the tin:
- Spoon batter into each mini muffin cup until about 3/4 full—use an ice cream scoop if you have one for even portions. Sprinkle extra chocolate chips on top of each bite for a look that's as festive as it is delicious.
- Bake until fudgy:
- Bake for 13-15 minutes; they should look set on top but feel slightly soft when you press gently. Insert a toothpick into one—you want it to come out mostly clean with a few moist crumbs clinging to it, not dry.
- Cool with patience:
- Let them sit in the tin for 5 minutes so they firm up enough to handle, then transfer to a wire rack to cool completely. If you eat them while still warm, they'll fall apart, but if you can wait, that first cool bite is unforgettable.
 Pin it
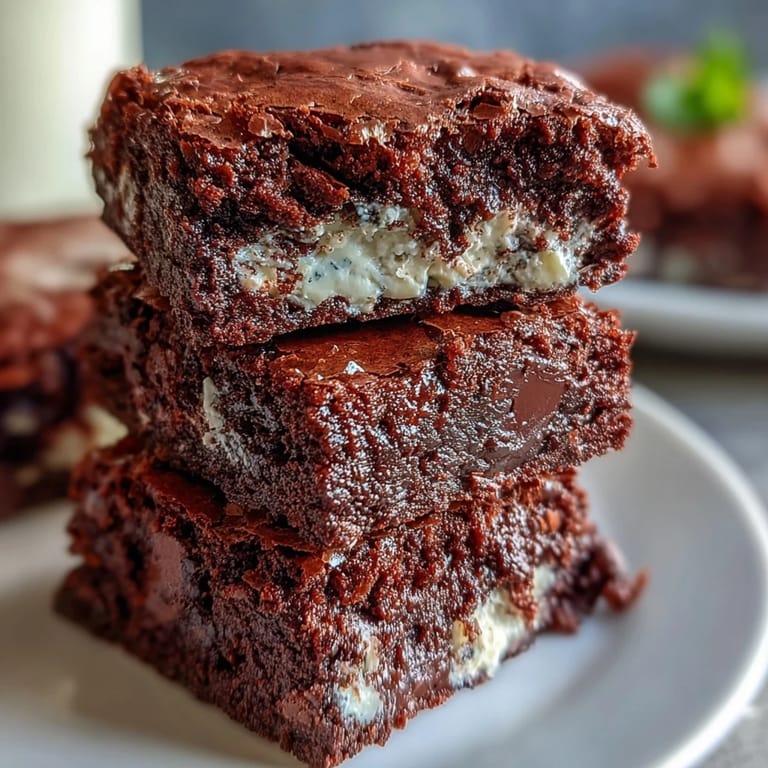
 There's something about serving a tray of these at a party and seeing someone's face when they bite through the fudgy exterior into that creamy mint-chocolate center—it's the kind of small triumph that makes you want to bake more. These bites have become my go-to gift or addition to any table between mid-February and St. Patrick's Day, and honestly, I've started making them year-round because nobody complains about festive chocolate.
The Mint-to-Chocolate Ratio Balance
Peppermint and chocolate are a classic pairing, but the ratio is everything. I learned this the hard way by doubling the extract once and ending up with brownie bites that tasted like I'd melted a candy cane into cocoa. The 1/2 teaspoon amount in this recipe is calibrated so the mint feels like an accent, a cool whisper that makes the chocolate taste richer rather than an overpowering flavor bomb. If you love intense mint, increase it by just 1/4 teaspoon at a time and taste the batter—this way you're in control of the final flavor.
Make-Ahead and Storage Strategy
These bites are forgiving in the best way, which means you can prep them hours or even a day before serving. I've baked them in the morning, stored them in an airtight container, and they stayed perfectly fudgy through the evening—the cocoa actually keeps them moist. Room temperature is ideal, but they're also delicious pulled straight from the fridge if you want them extra firm and cold, almost like a mini brownie truffle.
Customization Without Losing the Magic
The beauty of this recipe is how adaptable it is without compromising the core experience. Swap the Andes mints for after-dinner mints, crush a candy cane and fold it in for texture, or skip the mint pieces entirely if you want a classic brownie with just the extract's subtle flavor. Some people use dark chocolate chips instead of regular ones, which deepens the richness, while others add a tiny pinch of espresso powder to make the chocolate even more complex without tasting like coffee.
- Keep the peppermint extract amount consistent—the batter flavor is your guide to success.
- If you don't have a mini muffin tin, this batter works in a small greased loaf pan, though you'll need to increase baking time to 20-25 minutes.
- Always cool completely before storing to prevent condensation that makes them sticky.
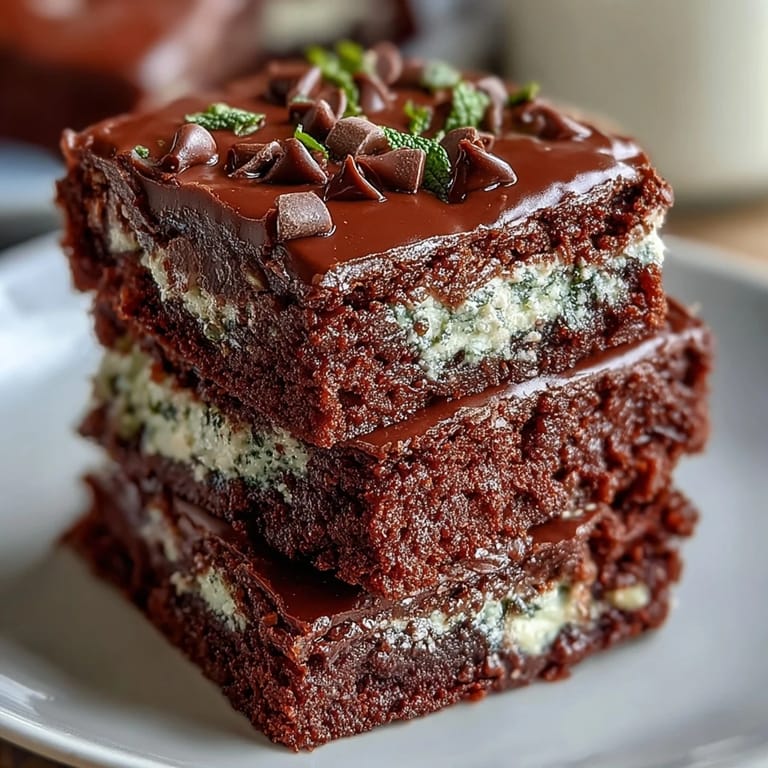 Pin it
 There's real joy in a recipe this simple that delivers this much flavor and makes people feel celebrated. Make these, and you'll have a new tradition that feels far more impressive than the handful of minutes it takes to bake.
Common Questions
- → What gives the brownie bites their mint flavor?
The refreshing mint flavor comes from peppermint extract and optional chopped Andes mints blended into the batter.
- → Can I use regular chocolate instead of mini chips?
Yes, chopped chocolate bars can be used, but mini chips offer even distribution and a better melt texture.
- → How do I ensure the bites stay fudgy and moist?
Using melted butter and careful baking just until a toothpick shows moist crumbs help maintain a fudgy texture.
- → Is green food coloring necessary for flavor?
No, green food coloring is optional and used only for visual appeal, especially during festive occasions.
- → What’s the best way to store these brownie bites?
Store them in an airtight container at room temperature to keep freshness, ideally consumed within five days.