 Pin it
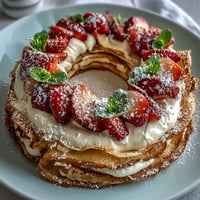
 With the lingering scent of rosé and vanilla in the air, I found myself beaming as the kitchen filled with a gentle hum of anticipation. There's something truly delightful about crafting a cake that looks like it came straight from a Parisian patisserie, all soft blush hues and shimmering gold. I remember how the first swirl of batter, tinged delicately pink, made me stop and marvel at the elegance unfolding right before my eyes. Baking this Rosé Velvet Cake always turns an ordinary afternoon into a mini celebration. It has an effortless way of stealing the spotlight and making guests pause mid-conversation for another forkful.
The first time I made this for my cousin's bridal shower, the kitchen was a flurry of laughter and cake crumbs. My niece kept sneaking in to swipe a bit of frosting, and I almost forgot to chill the crumb coat in all the excitement. That day, the cake became a centerpiece, but it was the fun of decorating it together that made it unforgettable. There's magic in the shared silence as everyone leans in to admire the final gold drip moment. I'll never forget how we lingered around the table, plates in hand, picking out little flecks of gold.
Ingredients
- All-purpose flour: Provides structure for the perfect tender crumb; I always sift it to avoid clumps in the batter.
- Granulated sugar: Balances the cocoa and rosé flavors, and a gentle creaming yields a light cake texture.
- Baking soda and baking powder: These work in tandem for just the right rise; make sure they're fresh for the fluffiest results.
- Salt: Essential for amplifying the flavors and keeping the sweetness in check.
- Unsweetened cocoa powder: Adds subtle warmth and depth to the blush cake without overpowering color or taste.
- Unsalted butter: A must for that melt-in-your-mouth richness; I always let it soften fully for effortless creaming.
- Buttermilk: The key to moist, tender layers; room temperature helps it blend seamlessly with the other ingredients.
- Rosé wine: Infuses the cake and frosting with gentle floral notes and the prettiest pink hue.
- Large eggs: Help bind everything together and contribute to a soft crumb.
- Vanilla extract: Adds background warmth and pairs beautifully with the rosé.
- White vinegar: Reacts with the cocoa for extra tenderness—the secret to velvet cake texture.
- Pink food coloring gel: Lets you control the blush shade; gel doesn't affect batter consistency like liquid.
- Cream cheese: In the frosting, it adds tang and balances the sweetness.
- Powdered sugar: Sifted for a cloud-like, smooth frosting finish—you'll thank yourself for this extra step.
- Heavy cream: Ensures a silky gold drip; don't rush the melting process for the best shine.
- White chocolate chips: Their creamy base sets the stage for that beautiful, edible gold finish.
- Edible gold luster dust: Gives the cake its regal magic—remember to use a light touch when painting.
- Vodka or clear extract: Used to make paint from the luster dust; don't worry, the alcohol evaporates quickly.
Tired of Takeout? 🥡
Get 10 meals you can make faster than delivery arrives. Seriously.
One email. No spam. Unsubscribe anytime.
Instructions
- Prep the pans:
- Grease and line three 8-inch round cake pans with parchment so the cakes pop out effortlessly when cooled.
- Sift the dry ingredients:
- Combine flour, cocoa, baking soda, baking powder, and salt, sifting to ensure your cake layers bake up tender and even.
- Cream the butter and sugar:
- Beat together until the mixture is pale and fluffy—it should look almost like whipped frosting and smell rich and sweet.
- Add eggs and vanilla:
- Incorporate eggs one at a time—don't rush this step—then blend in vanilla for that bakery-style aroma.
- Incorporate buttermilk, rosé, and vinegar:
- Pour these in slowly, letting each addition fully mix in so the batter stays smooth and light.
- Add dry to wet ingredients:
- With the mixer on low, add flour mixture in batches, scraping the bowl to keep everything velvety.
- Tint the batter:
- Stir in just enough pink gel to get your perfect blush—start light, as the color deepens when baked.
- Bake the cakes:
- Divide batter evenly and bake 30–35 minutes, checking with a toothpick for doneness—it should emerge mostly clean with a few crumbs.
- Cool the cakes:
- Let them sit 10 minutes, then flip out onto wire racks and breathe in that sweet, chocolaty aroma as they cool completely.
- Make the frosting:
- Beat butter and cream cheese together until super silky, then add sifted powdered sugar, rosé, vanilla, and salt, whipping until fluffy.
- Assemble and crumb coat:
- Level the cakes, stack with frosting between layers, smooth on a thin crumb coat, and chill for half an hour to set your base.
- Final coat of frosting:
- Swirl on the remaining frosting for a dreamy, creamy finish, using an offset spatula for extra flair.
- Make the gold drip:
- Melt white chocolate chips with cream until glossy and smooth—let it cool slightly before dripping over the cake edges for control.
- Paint with gold:
- Mix luster dust with vodka or extract, gently brush over the set chocolate drip, and step back to admire the transformation.
- Chill and serve:
- Let the cake firm up in the fridge for at least 30 minutes before slicing to reveal those perfect, blushing layers.
 Pin it
  Pin it
 After the first forkful disappeared at our backyard table, something shifted: the cake became a shared symbol of joy and accomplishment, not just for the bride-to-be but for our whole circle. That shimmering cake stood as a reminder that the most beautiful moments are often the ones we create together, flour on our cheeks and laughter echoing in the kitchen.
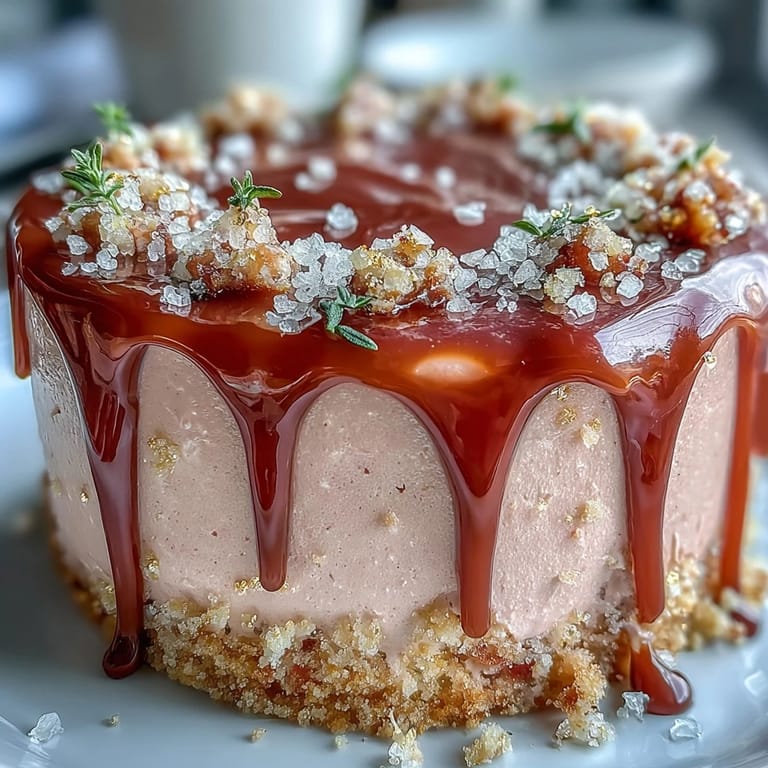
Making the Gold Drip Shine
Getting that perfect gold drip took some practice—and a little patience. If I rush the process, the chocolate tends to get too thick or run off too quickly. I've learned to let it cool just enough so it hugs the cake without pooling at the base. Using a clean food-safe brush for the luster dust feels a bit like painting, and it turns the whole cake into a canvas.
Decorating for Extra Glam
When it comes to decorating, I love letting loose with edible flowers or fresh berries. Mixing textures and colors always brings the cake to life and gives every slice a touch of whimsy. Sometimes, I press tiny gold leaves or candied petals into the frosting for a little extra sparkle. The looks from friends as they peek at each detail are half the fun of serving this cake.
Last-Minute Success Hacks
One trick that changed everything for me is brushing the cooled cake layers with just a bit of rosé before frosting. If you prefer a non-alcoholic version, sparkling grape juice works wonders for flavor and hue. Making the cake ahead of time (and chilling overnight) helps keep the layers sturdy and makes assembly smoother.
- Store leftover cake in the fridge in an airtight container—they'll stay moist for days.
- Always taste the frosting before decorating; a touch more rosé or vanilla can make it your own.
- If the drip isn't perfect, cover with berries or flowers—no one will ever know.
 Pin it
  Pin it
 I hope this Rosé Velvet Cake brings as much sparkle and laughter to your special occasions as it has to mine. It's the kind of recipe that turns gatherings into golden memories—one slice at a time.
Common Questions
- → How can I boost the rosé flavor without making the batter too wet?
Brush cooled layers lightly with a reserved splash of rosé or a reduced rosé syrup to concentrate flavor. Add rosé mainly to the frosting rather than the batter to avoid changing the crumb; use small amounts and taste as you go.
- → What's the best way to achieve an even blush-pink crumb?
Use gel food coloring and add it a drop at a time, folding gently until the desired shade is reached. Gel gives a concentrated color with minimal impact on batter consistency; avoid overmixing to keep the crumb tender.
- → How do I keep cream cheese frosting smooth and stable for stacking?
Start with chilled but soft cream cheese and butter, beat until smooth, then add sifted powdered sugar gradually. Chill the frosting briefly if it gets too soft, and apply a crumb coat before the final chill to stabilize layers during assembly.
- → Any tips for a shiny, even gold drip on the edge?
Heat white chocolate with cream until fully melted and cool to room temperature so the drip holds its shape. Pipe or spoon small amounts at the edge, then chill to set. Mix edible gold luster dust with a splash of vodka or clear extract and paint the set drip with a food-safe brush for a lustrous finish.
- → What non-alcoholic alternative preserves the rosé character?
Use sparkling grape juice or a reduced grape juice syrup to mimic rosé notes. Brush layers lightly with the syrup or fold a small amount into the frosting to retain the pink wine flavor without alcohol.
- → How should the finished cake be stored and how long will it keep?
Store the cake refrigerated, loosely covered to protect the gold finish. It keeps well for up to 3 days; bring to room temperature for 30–60 minutes before serving for best texture and flavor.